Award

Testimonials
"It does a great job. If you are looking for an image converter , it may be of help."
- Softpedia
"It is very easy to use.
It is very effective in what it does.
I am very happy!"
- Andrew MacArthur
Find Us
Hot Guides & Tutorials
PearlMountain JPG to PDF Converter Program Interface
The PearlMountain JPG to PDF Converter main window may be divided into the following parts:

Main Menu
The Main Menu consists of the following items which allow you to get quick access to the most frequently used program functions:
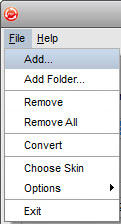
File
Add - Use it to add the image files you need to convert.
Add Folder - Use it to add the folder with the image files you need to convert.
Remove - Use it to remove the currently selected image file from the program.
Remove All - Use it to remove all the image files added to the PearlMountain JPG to PDF Converter program.
Convert - Use it to start converting images progress.
Choose Skin - Use it to change the skin of the program.
Options - Use it to open the adjustment options of PearlMountain JPG to PDF Converter.
Exit - Use it to close the PearlMountain JPG to PDF Converter window and finish the work with the program.
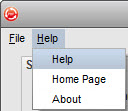
Help
Help - Use it to open the PearlMountain JPG to PDF Converter help file.
Home Page - Use it to open the PearlMountain web site.
About- Use it to open the window with the information of PearlMountain program.
Image List Area
The Image List Area is used to add images or image folders you need to convert. The area can manage and preview images after they have been added.
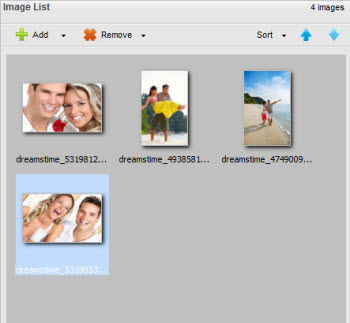
Add - Use this button to add images. Click the down-drop arrow and choose Add Folder to add all the images in the folder.
Remove - Use this button to remove unwanted images. Click the down-drop button and choose Remove All to remove all the images in the image list.
Sort - Use it to adjust the sequence of images automatically.
![]() - Use it to change the order of selected image.
- Use it to change the order of selected image.
Working Area
The Working Area of the PearlMountain JPG to PDF Converter is used to adjust output image settings.
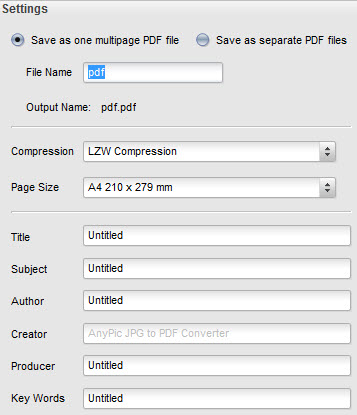
Settings
Save as one multipage PDF file - Use this to save all converted images in one PDF file.
Save as separate PDF file - Use this to save all converted images in separate PDF file.
File name - Use it toset the output PDF file name, you could see the Output Name will change as you input the name and suffix.
Compression - Use it to choose ways of compression, you can choose DCT-JPEG Compression, LZW Compression or No Compression.
Page Size - Use it to select one of the available presets to resize the images added to the PearlMountain JPG to PDF Converter program.
Title - To give a brief summary of the work it deals with
Subject - To give the crucial matter of conversation
Author - To record who make this conversation
Creator - To record the name of tool
Producer- To record a person who creates this program
Key Words - To write the key words of PDF file
Output Image Area
Output Image Area is a part of the PearlMountain JPG to PDF Converter main window where you can set the location for your output image and start the conversion process.

Destination Folder - Save the converted images here.
Browse - Browse for a destination folder to save the converted images.
Open - Use this to open the destination folder
Convert - Use this to start converting images.
Related Software
PearlMountain Image Converter allows youto convert images to other formats, resize, rotate, crop, add watermark, apply effects and add border to thousands of images at a time. It supports the 60+ image formats, including the most popular ones: JPEG, BMP, TIFF, PNG, PSD, GIF, TGA, ICO, PDF, RAW and many others.
![]() Buy PearlMountain Image Converter ( $29.90 )
Buy PearlMountain Image Converter ( $29.90 )